The Urban Farmer, Issue #112
May, 2009:
Sterilizing Media * Mealybugs *Dear Simon: Now What?

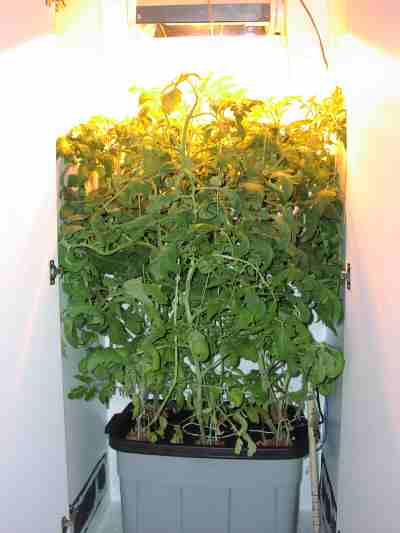
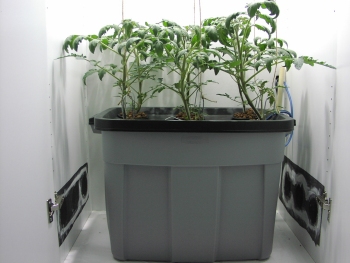
Hydroponic broccoli in my winter porch garden
“Like a gardener, I believe what goes down must come up.”
~Lynwood L. Giacomini
Hydroponics Techniques
Sterilization of the Medium
Each time you tear down your hydroponic garden at
the end of a crop season, you will want to either sterilize or replace the
growing medium. The ability to maintain a sterile planting medium is one of the
major benefits of hydroponic farming. Why? You can prevent carry-over of pests
and diseases (viruses and bacteria) from one crop to the next. In a traditional
garden, this is not possible.
But, this requires a little bit of work on your part. If plants are grown over
and over in the same medium, “soil-borne” pests and diseases may accumulate and
hide out in your system. Chances of a devastating outbreak increase with each
successive crop.
Totally inert, rigid material like gravel, coarse sand and LECA (clay balls) are
easy to sterilize with a 10% chlorine bleach solution. You simply soak the
medium for half an hour in the bleach-water, then drain and flush thoroughly
with clean water.
Other, “softer” media like coco coir, perlite and rockwool are a little
trickier. If you can afford it, just replace them every planting or two. You can
try the bleach method above, or even “steaming” the stuff in the oven at 180 for
at least half an hour. Needless to say, this is quite a messy undertaking.
Aside from the medium, you also want to sterilize the growing beds and equipment
between plantings. Simply scrub with a 10% bleach solution and rinse well.
You might also try Simon’s simplified sterilization method:
Leave the medium in the pots. Take them outside, drench with the 10% bleach
solution. Flush gently but
thoroughly with clean water. Leave them outside to drain and dry out. We’ve even
left them out in the rain for a good shower. Those pre-planted pots will be
ready for the next planting! This will only work 2-3 times, but does save quite
a bit of labor and money.
Pest of the Month

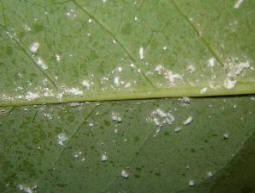
Mealybugs
Mealybugs are a common problem on indoor plants, you may have had them on your
common houseplants.
How to identify: Distorted leaves; plant suddenly wilts and leaves drop
off; weakened plants. Clusters of mealybugs look like a cottony mass. You may
find small puffs of cotton in the joints where the stems branch or on the
undersides of leaves. It’s only on close inspection that you will see
individual, soft bodied, very slow moving insects. Use a magnifying glass to
inspect the top and bottoms of the leaves.
How to treat:
For a light infestation: Scrape off the powdery masses with your fingers.
Swab the affected areas with a q-tip dipped in rubbing alcohol. Then be on the
lookout every day for more mealybugs.
For a more serious attack: Spray with Safer’s Insecticidal Soap. Follow
the directions on the bottle.
Natural biological control for a greenhouse: Mealybug Destroyers (or
Crypt Beetles) can be ordered from nursery supply houses, and do a great job
controlling mealybug in a greenhouse setting.
Good luck and happy hunting!
Dear Simon: Now What?

Dear Simon:
I’m in the process of setting up your Dutch pot system. My problem is that I do
not have a clue about how to start tomato and pepper seeds. What is the best
(translated cheapest) method of doing this. I would like to avoid using dirt if
I can.
Finally I want to thank you for a wonderful web site. You are to be
congratulated for your work.
Bill
Dear Bill,
Hi, and thanks for your kind words regarding our new website. Our very next
section we are working on is seeds & seedlings! (Sounds like it is needed).
Just go to any garden center and pick out some seeds. Start them in either
“perfect starts”, “rapid rooter plugs”, or 1.5″ rockwool starter cubes. Those
are the three best starter plugs for hydro. Order them from your hydroponics
supplier. Don’t use jiffy pots or soil, they are not good for hydroponics.
Put 2-3 seeds in each cube, keep moistened and warm, like in a tray on kitchen
windowsill, plenty of light. They will sprout. Keep them moist. Once up and
running, cut off the extras and leave only the best seedling in each cube. When
they are about 4 inches high with 4 true leaves, transplant to the hydroponic
medium.
Good luck, Bill
Hydroponics is great fun.
Simon
Editor: Our new section on
Seeds &
Seedlings is up and growing. Visit the nursery today!
We hope you have enjoyed this issue of The Urban Farmer Ezine. Each month, we will bring you another inspiring photo, gardening quote or idea, plus fresh new hydroponics news, techniques & products.
Insiders tips to get you growing…

~Stella and Simon from Hydroponics-Simplified.com
|


Reply