The ebb and flow hydroponic system (also called flood and drain) is the classic hydroponic setup. It is easy to understand, build, and maintain. It’s versatile and can accommodate pots of any size, or even Rockwool blocks. We love the ebb and flow and use it often.
Our Beginner’s Guide To Hydroponics is on sale for a short time. Check it out!
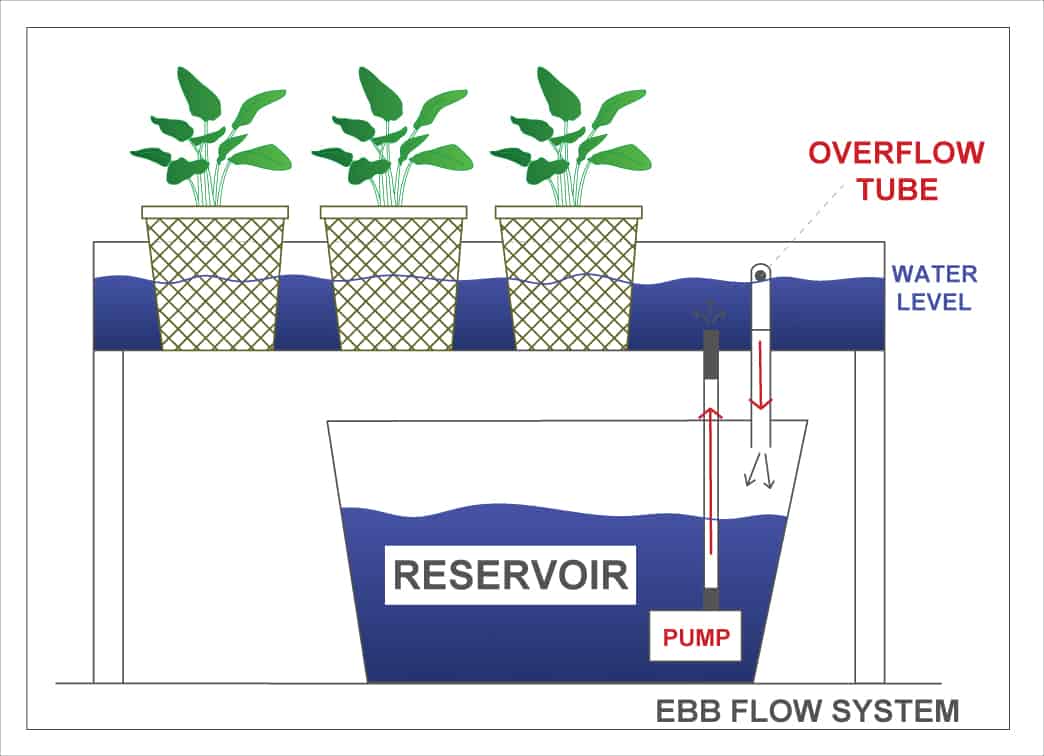

How Does The Ebb And Flow Hydroponic System Work
Individual potted plants are arranged on a drain table or “growing bed” which can hold a few inches of water. Periodically, the nutrient solution is pumped in, flooding the holding bed.
The plants are watered from the bottom through the drain holes in the pots.
After a few minutes of soaking, the pump cuts off, and the table drains, the nutrient returning to the reservoir below it. This flood-and-drain cycle repeats 2-4 times a day. Simple but very effective.

Learn to build a large ebb & flow system (4X4 growing bed with 24 large pots!) Read all about it here: Simon’s Simple Hydroponic Plans.
Not ready for a large garden yet? Get started below with our small ebb & flow mini-farm [2-4 pots] – FREE plans!
Not into Do-It-Yourself? Perhaps one of these complete kits is perfect for you.
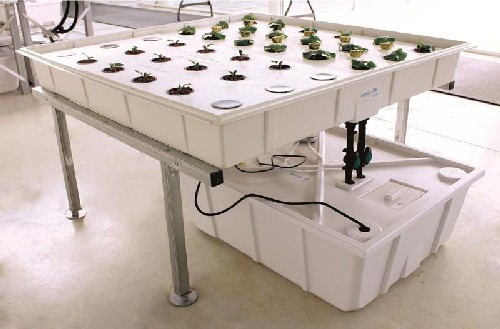

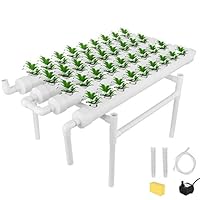
Grow large in a small space with the classic ebb & flow. Automated and effective, ebb & flow delivers optimal water, nutrients, and oxygen to the plant roots. Kits include pump, reservoir, grow tray, ebb and flow kit, and galvanized metal frame.
Hydrofarm Hydroponic Megagarden Ebb & Flow System in a 22 Active Aqua GFO7CB Ebb & Grow Flow Ebb and Grow Controller Hydroponic Planting Equipment Ebb and Flow Deep Water Culture
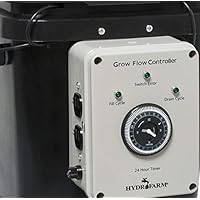

Ready to “go pro”? Buy multiple 4′ x 8′ table kits and fill up your greenhouse with healthy, nutritious veggies for the market.
Step 1: How to build a small DIY ebb and flow hydroponic system
This is a great, dependable little unit. You can grow four 6” to 8” pots or several smaller plants. It costs about $90 (not including a lamp and food). Most of the materials are available from Home Depot or Walmart. A few items must come from a hydroponics supplier (but we give you a good cheap source).
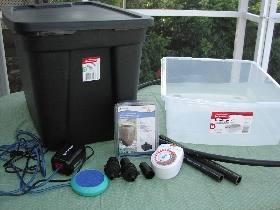
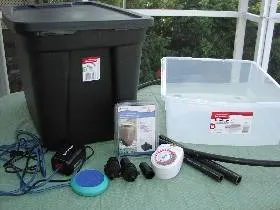
Supply list:
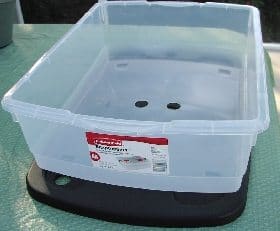
- Rubbermaid black storage tote bin with lid – 18 gallons (Walmart) – or similar sturdy tote bin of 16-20 gallon volume
- Rubbermaid snaptoppers clear tote- 30 qt. (Lowe’s or Home Depot) – or similar flat bin that will fit on top of the tote bin
- Timer, mechanical garden; 15-minute increments (Walmart)
- Aquarium air pump, 6 feet of airline tubing, “T” connector & 5-inch airstone (Walmart)
- 4 cheap flower pots, 8” (Home Depot or Walmart)
- Small bag of perlite (Home Depot or garden center)
- Black irrigation tubing, ½ “ I.D. (inner diameter) about 18” long, (Home Depot)
- Small submersible pond pump- 120 gph (Home Depot or here’s one cheap)
- Fill and drain fitting set with one extension [order as below]
- One brick of coco coir & small bag of LECA (Hydroton or clay balls)
Tools needed:
- Power drill
- 1-1/4” hole saw
- 3/8” regular or spade drill bit
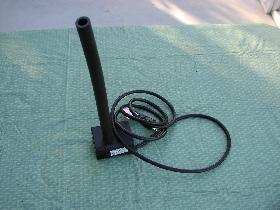
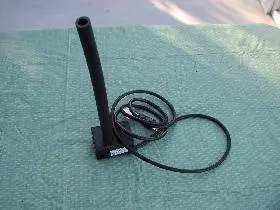
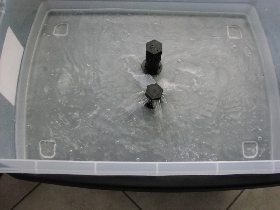
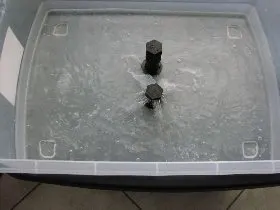
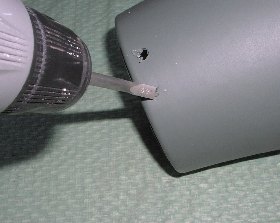
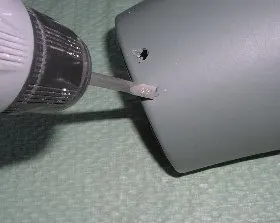
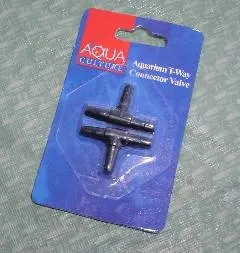
Step 2: Ebb and flow fittings for your mini garden

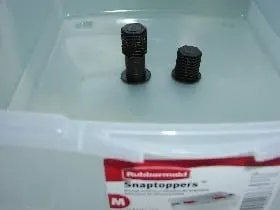
These are the fittings for the drain table. They comprise the major plumbing for this system.
The shorter pipe allows the fluid to flow up into the planting bed. The taller one acts as an overflow valve. When the level of fluid reaches the slits, it starts to drain back down into the reservoir, preventing the table from overflowing its sides.
The overflow tube in this photo has 2 extension pieces on it. We only use one extension for this project, so it won’t be this tall. You can order the complete kit here for a few bucks: Ebb and Flow Supplies.
How To Build Your Mini Ebb & Flow Garden
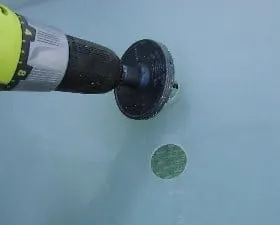
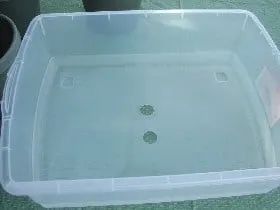
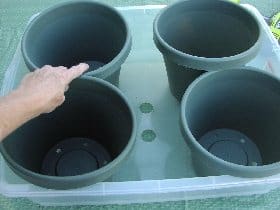
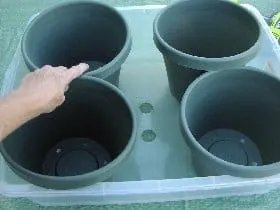
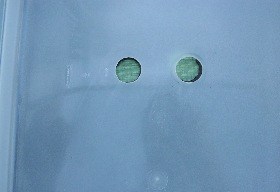
1. Cut two 1-1/4” holes in the center of the clear Snaptopper tray. Smooth the rough edges lightly with a file or sandpaper. Your 4 pots need to fit around these 2 holes, see below.
  |   |   |
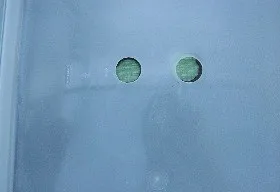
2. Place clear tray on top of the black tote lid and center it carefully both ways. Mark the exact center of each hole in the tray onto the black lid with a marker. Then cut two 1-1/4” holes in the black lid where marked. The idea is to line the holes up in each piece as shown below, right.
  |   |
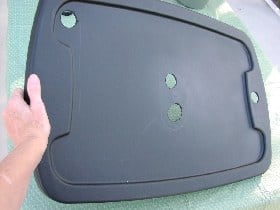
3. Cut 2 additional 1-1/4” holes in either side of the black lid:
- One is for the pump plug and bubbler tubing to pass through.
- The other is to check the fluid level and to add nutrient solution after assembled.

4. Screw the two drain fittings into the center holes in the clear bin only. The rubber gasket goes on the underside of the bin. Hand tighten securely but do not use tools or you will strip them out. Place ONLY ONE extension on the overflow tube (the thicker, 3/4” tube), as shown below.

Part 3: Plumb Your Ebb and Flow Tray
5. Place 1/2” irrigation tubing over the water pump outlet fitting. Depending on the type of tubing or hose you have, you may have to secure the tubing onto the pump outlet with a zip tie or may have to taper the inside of the tube with a razor knife if it is too small. You want a nice snug fit.
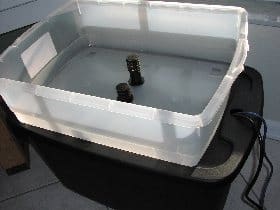
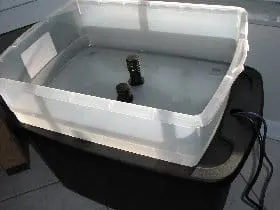
6. Place the clear tray with drain fittings in place over the black lid, lining up the holes. They should line up nicely and the fittings will drop down through the holes in the black lid.
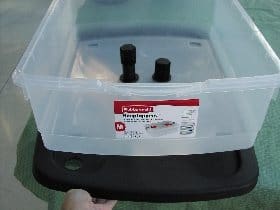

7. Trim the 1/2” black tubing to a length that allows the pump to sit on the bottom of the black tote bin (reservoir) when the lid is on. This may take some dry runs and measuring to get it right. Then push the tubing over the port of the SHORTER drain tube (the 1/2” or inflow tube) from the underside of the black lid. Use a zip tie if necessary to get a snug fit. You don’t want this tubing slipping off either end during assembly.
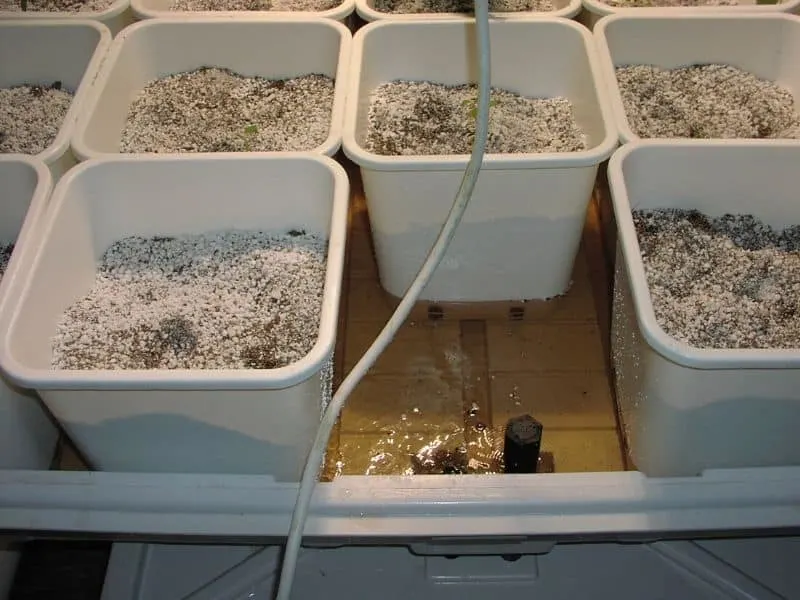
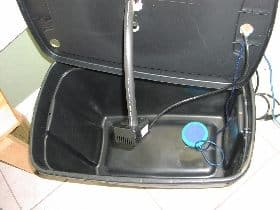
Drop the bubbler stone into the bottom of the black bin, and run the attached airline tubing and the pump plug through the side access port you drilled into the side of the lid (see below, left).
Then place the lid/tray assembly on top of the tote, and snap it into place. Voila! So close to finishing up your new ebb and flow mini-farm!
  |   |
A flood and drain system provides probably the most flexible and versatile hydroponics system of all.
Top drip and other bucket systems are usually set up with multiple buckets of one size, and the grow unit will only fit a set number of buckets. No flexibility.
With a full-sized ebb and flow drain table, you can fit anything in there: from 2-inch potted seedlings to a 5-gallon fig tree! Mix and match! We have combined large Hydroton-filled buckets, several small pots of herbs, and slab Rockwool all in the same ebb and flow tray.
So we heartily endorse an ebb and flow system for your first water garden experience. Hydroponics simplified 🙂
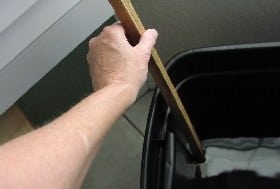
Part 4: The Reservoir
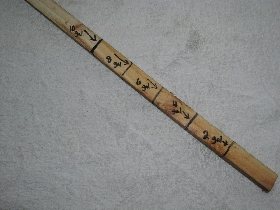
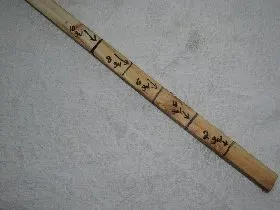
8. Make a “dipstick” out of a 1×1 stick or a wood dowel. Take the time as you add every 2 gallons of water to the reservoir bin to dip the stick in and mark the dowel with a permanent marker at each level. This will help you gauge the nutrient level later without removing the top and plants.
  |   |   |
9. Fill the black bin (reservoir) with 10 gallons of water. Add a nutrient concentrate of choice. If you are using GH Flora Series (highly recommended), add 10 tsp. each of the Flora Grow, Flora Micro & Flora Bloom, (one at a time, in that order).
Adjust the pH of the solution with a test kit (more on this later, too). Plug in the bubbler and pump and test the system for operation and leaks.
Note: the setup must be on a level surface.
  |   |
Pros and cons of flood and drain
Advantages:
- Simple, flexible, and reliable
- Low cost
- Very little plumbing
- Efficient use of water and nutrients; a “closed” system which reuses nutrient solution
- Uses a small, inexpensive, quiet pump
- Versatile: different sized pots can be placed together in one set-up
Drawbacks (not many!):
- May be hard to keep the nutrient solution cool
- Disease can spread quickly, as the plants all share the same nutrient source
- Poor or incomplete drainage of the drain tray could cause root rot or fungal growth
Part 5: Planting the Seedlings
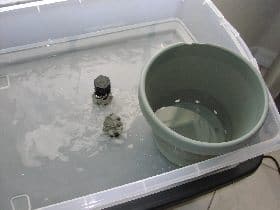
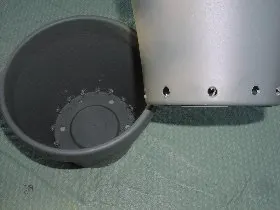
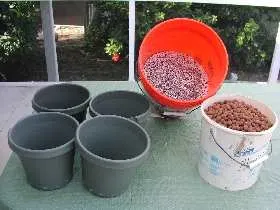
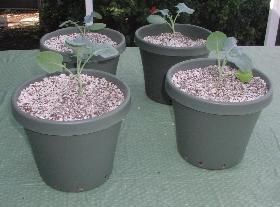
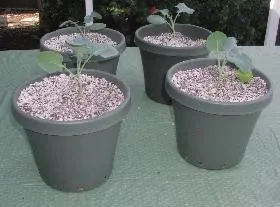
10. Now for the plant pots. I used 8” green flower pots from Home Depot, for a couple of bucks each. They didn’t quite fit in the bin, so I trimmed some of the lips on the tops of the pots with a razor knife so they then fit in nicely. I wanted the largest pots I could possibly squeeze in there.
You could also use several smaller pots if you wanted to grow herbs or the like. Drill several 1/4” or 3/8” holes around the sides of the bottoms of the pots, to provide good fill and drain of nutrient solution, as shown below.
  |   |
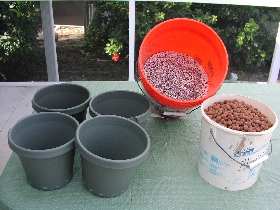
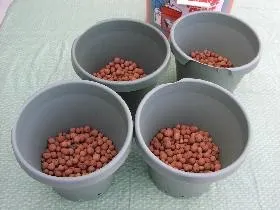
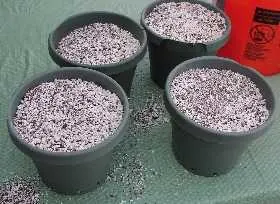
11. Fill the pots with your favorite hydroponics medium. We recommend a 50-50 mixture of coco coir and perlite, with an inch or two of LECA (Hydroton or clay balls) at the bottom. The coco/perlite mixture provides great moisture holding and aeration.
The hydroton at the bottom keeps the medium from flushing away out the drain holes. It makes a great sub-layer wick for ebb & flow pots. (More details and ordering of media in the Tips ‘N Techniques section at the end).
  |   |   |
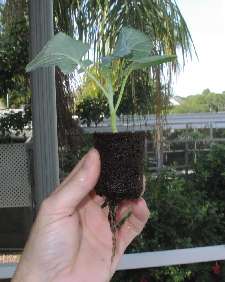
12. Now plant your seedling plants into the pots and pack the medium firmly around the plant. You cannot start seeds right in ebb & flow pots, as the moisture will not reach the top to keep the seeds moist. Start them first in grow cubes or pellets, or buy store-bought seedlings and rinse away all the dirt from the roots before transplanting them to the pots.
  | 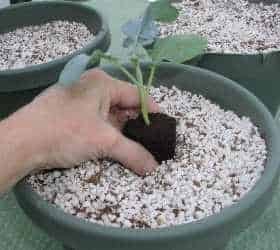 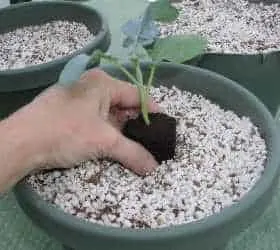 |   |
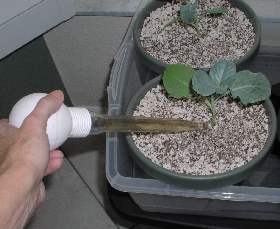
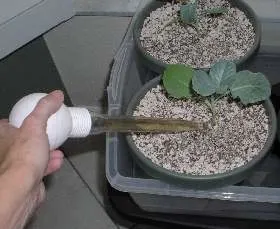
13. It’s a good idea to “top water” the plants for the first few days to make sure they don’t dry out while they get used to their new ebb & flow home.
Part 6: Reservoir Aeration
14. If you find that a small amount of water remains in the bottom of the tray (like 1/4”) after the drain cycle ends, you will need to raise the pots up off the bottom so they won’t sit in the standing water (and rot). Place something about 1/2” thick underneath them to get them up just a little but not too high.
Whatever you use, it must be inert and not add chemicals to the nutrient solution (don’t use bricks). Use something made out of plastic. We used some thin plastic slats left over from some old shutters.
15. Plug the water pump into the timer and set it to fill 3 times a day, for only 15 minutes each fill cycle. (6 am, noon and 6 pm are good). Let the plants rest through the night: no feeding.
Important: The air pump must be placed higher than the reservoir to prevent the backflow of the solution into the pump.
16. The bubbler pump with airstone stays on 24/7. This oxygenates and aerates the nutrient solution, keeping it from becoming stagnant.

Earlier we listed the cheapest supplies we could find, to help keep the cost of this setup low.
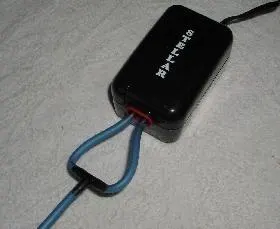
However, you might want to go to a pet shop and buy an upgrade air pump for the stone. We bought this one for $20 and it is super quiet! Also, you might want to look for a circular airstone.

This air pump has two outlet ports. If yours does too, then buy the “T” adapter and tie in both ports to one airstone. No use wasting half those precious bubbles!
Part 7: Operating tips & techniques
Well, you did it! You are now the proud owner of a brand-new hydroponics ebb and flow system. Our hope is that with this introductory project, you will come to love Hydro as we do.
This is just the beginning. After you find success with your easy hydroponics ebb and flow unit, we urge you to explore other systems and sample wide varieties of crops along the way.
Good luck to you, and most importantly… Have fun!
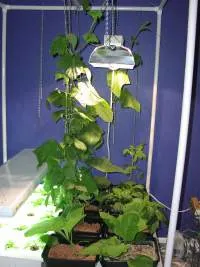
Lighting
You can use just the light from a sunny window if all you are growing are houseplants. Anything else requires some supplemental lighting.
A T5 compact fluorescent “grow light” will do fine for houseplants, herbs, and leafy green veggies like lettuce.

You can get off much cheaper by getting a fluorescent “grow stick” at Walmart for between $25 and $35, but you will not get the lush growth a better light setup will produce. For best results, upgrade to a 200-watt bulb.
TIP: The grow room must be kept cool. Use a fan on low in there to cool it down. HID lamps will really add some heat.
If you are interested in fruiting veggies like tomatoes, or serious herbs, you will have to upgrade to an HID lamp. Learn more about HID lighting
and see our special combo lamp deal here: Hydroponic Lights
Nutrients
")
In keeping with our philosophy of easy hydroponics ebb and flow operation, we highly recommend the Flora Series nutrient solutions put out by GH (General Hydroponics). This stuff is superior, easy to use, and reasonably priced. It consists of 3 parts (Flora Grow; Flora Micro; and Flora Bloom). If you have hard water, get the Hardwater Flora Micro instead.
For this smaller garden, order a quart of each of the three solutions. Stick with Flora Series, follow the label directions, and you can’t go wrong!
The nutrient reservoir must be kept cool (55-70°). This is especially important for cool-season crops like lettuce and broccoli. Learn more about hydroponics nutrient solutions here: Hydroponic Solution. We also provide a nifty little mixing chart there for the Flora nutrients that you can print out and save.
As the nutrient level drops in the reservoir bin, you need to periodically add water only (not more nutrients). Keep track of how many gallons you top up with. When you have replaced 5 gallons of water, stop topping up and let the level drop down towards the pump.
When it starts “sucking air”, drain the bin and mix up a whole new batch of nutrient solution. Each new 10-gallon batch should last 3-5 weeks by following this “50% system”.
pH
It is a very good idea for any serious hydroponics project to keep the pH of the water in the proper range, which is 5.5 to 6.5 (6.0 is ideal). If the pH is out of range, some of the nutrients get “locked out” and the plants suffer.
GH puts out a simple test kit with pH up & down solutions cheap. It will last you through many gardens.

Growing media

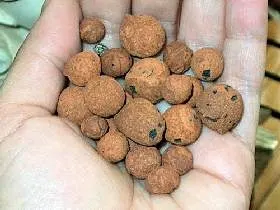
You can actually use whatever growing medium you prefer in the ebb and flow pots. We recommend a 50/50 Coco Coir and perlite mixture for the
growing area. Line the bottom of the pots first with 2” of LECA (Hydroton; clay balls).
LECA provides an excellent wick for the nutrient solution and prevents all the Coco/perlite mixture from washing away during the ebb cycle.
Perlite can be bought at any garden center. Coco Tek and Hydroton balls must be ordered from a hydroponics supplier.
Flood and Drain Project (Ebb and Flow) Plans

We hope you will try out our plans for this cool little flood and drain project. You will be amazed at the scope and amount of produce you can reap from this unit. It provides a great introduction to hydroponics for adults and children alike, and it’s just plain FUN.
Our guess is that once you get a taste of hydro in this way, you will go on to bigger and better things. This field of horticulture is wide open! There are many different methods for you to try, and you’ll just get more knowledgeable and skilled at it as time goes on.
You might try growing heirloom tomatoes, medical herbs, or even orchids. Or you might just enjoy munching on your own healthy, homegrown salad
micro-greens!
No matter which way your interests take you, you are sure to enjoy this clean, healthy, prolific, earth-friendly gardening method. We just love hydroponics and know you will too.
Explore the hydroponics category here on our website often for updates on equipment, lighting, nutrition, plants and seeds, pests, grow-closets, and plans for several other different growing systems. We provide simple information, insider secrets, and easy-to-follow instructions to get you up and growing in no time…
Conclusion – flood and drain project, also known as ebb and flow
We decided a pause would be good here to help you take a step back and look at the system before you get started ordering equipment and supplies.
Ebb and flow is a hydroponics system widely used because of its simple design, reliability, and low cost. Pots containing neutral medium (such as clay balls, perlite, or coco coir) are planted with young seedlings.
The planting medium is not meant to provide any nutrients at all, but simply to support the plant and allow easy flow of nutrient solution around the roots.
The pots are set upon a drain tray which is periodically flooded with a balanced nutrient solution. The liquid enters through holes in the bottom of the pots and soaks the medium and plant roots for a short period of time. Then the solution is allowed to drain away, allowing the plants to aerate and breathe.
That’s it in a nutshell!


Stella and Simon, a couple of back-to-the-land, baby boomer enthusiasts, have embraced the world of homemade hydroponics on their three-acre plot of Florida piney woods. Their journey began after drawing inspiration from Epcot Center’s hydroponics exhibit, and they've delved into various hydroponic methods, experimenting with different systems, configurations, and crops both indoors and outdoors. Their expertise culminated in the creation of an innovative homemade hydroponics greenhouse, documented in their book, Simon’s Super Simple On-the-Grid, Off-the-Grid Hydroponic/Aquaponic Survival Greenhouse.
Incredible Hydroponic Backyard Fence Garden Idea
Sunday 10th of July 2022
[…] This type of hydroponics is called ebb and flow, or flood and drain. Read more about the ebb and flow hydroponic system here. […]
Best Hydroponic Growing Medium For Your Garden
Tuesday 22nd of December 2020
[…] Ebb & Flow: 2″ of LECA at the bottom; top up with 50/50 Coco & Perlite […]
Growing Hydroponic Tomatoes
Monday 23rd of November 2020
[…] Or you can use the ebb and flow system. […]
How To Plant Hydroponic Seeds For A Great Harvest
Friday 20th of November 2020
[…] glued and drilled and cussed. Three trips to Home Depot. But you did it! Your beautiful shiny new hydroponics unit is ready to start […]
DIY Greenhouse - A Step-By-Step Guide
Sunday 1st of November 2020
[…] you could create a large, effective ebb and flow system which relies solely on hand power. This involves raising and lowering the drain bucket 2-3 times a […]